Glass3 SDK Quick Start
This page helps you prepare the development environment and complete the basic phone-side and glasses-side SDK integration.
What you will complete
After following this guide, you should be able to:
- Confirm the debug cable, screen mirroring tool, and development environment.
- Add SDK dependencies for both the phone app and glasses app.
- Know where to go next: Demo running guide, code samples, API reference, and glasses UI guidelines.
If you prefer to watch a video first, see Build an app in five minutes. For actual integration, we recommend following the steps on this page.
If you want to run the official Demo first, read the Demo running guide. The sections below focus on configuring the Maven repository and adding SDK dependencies in your own Android project.
If you are building glasses-side UI, read the Glasses UI guidelines before implementation to understand the Glass3 display area, layout constraints, safe spacing, and visual presentation recommendations.
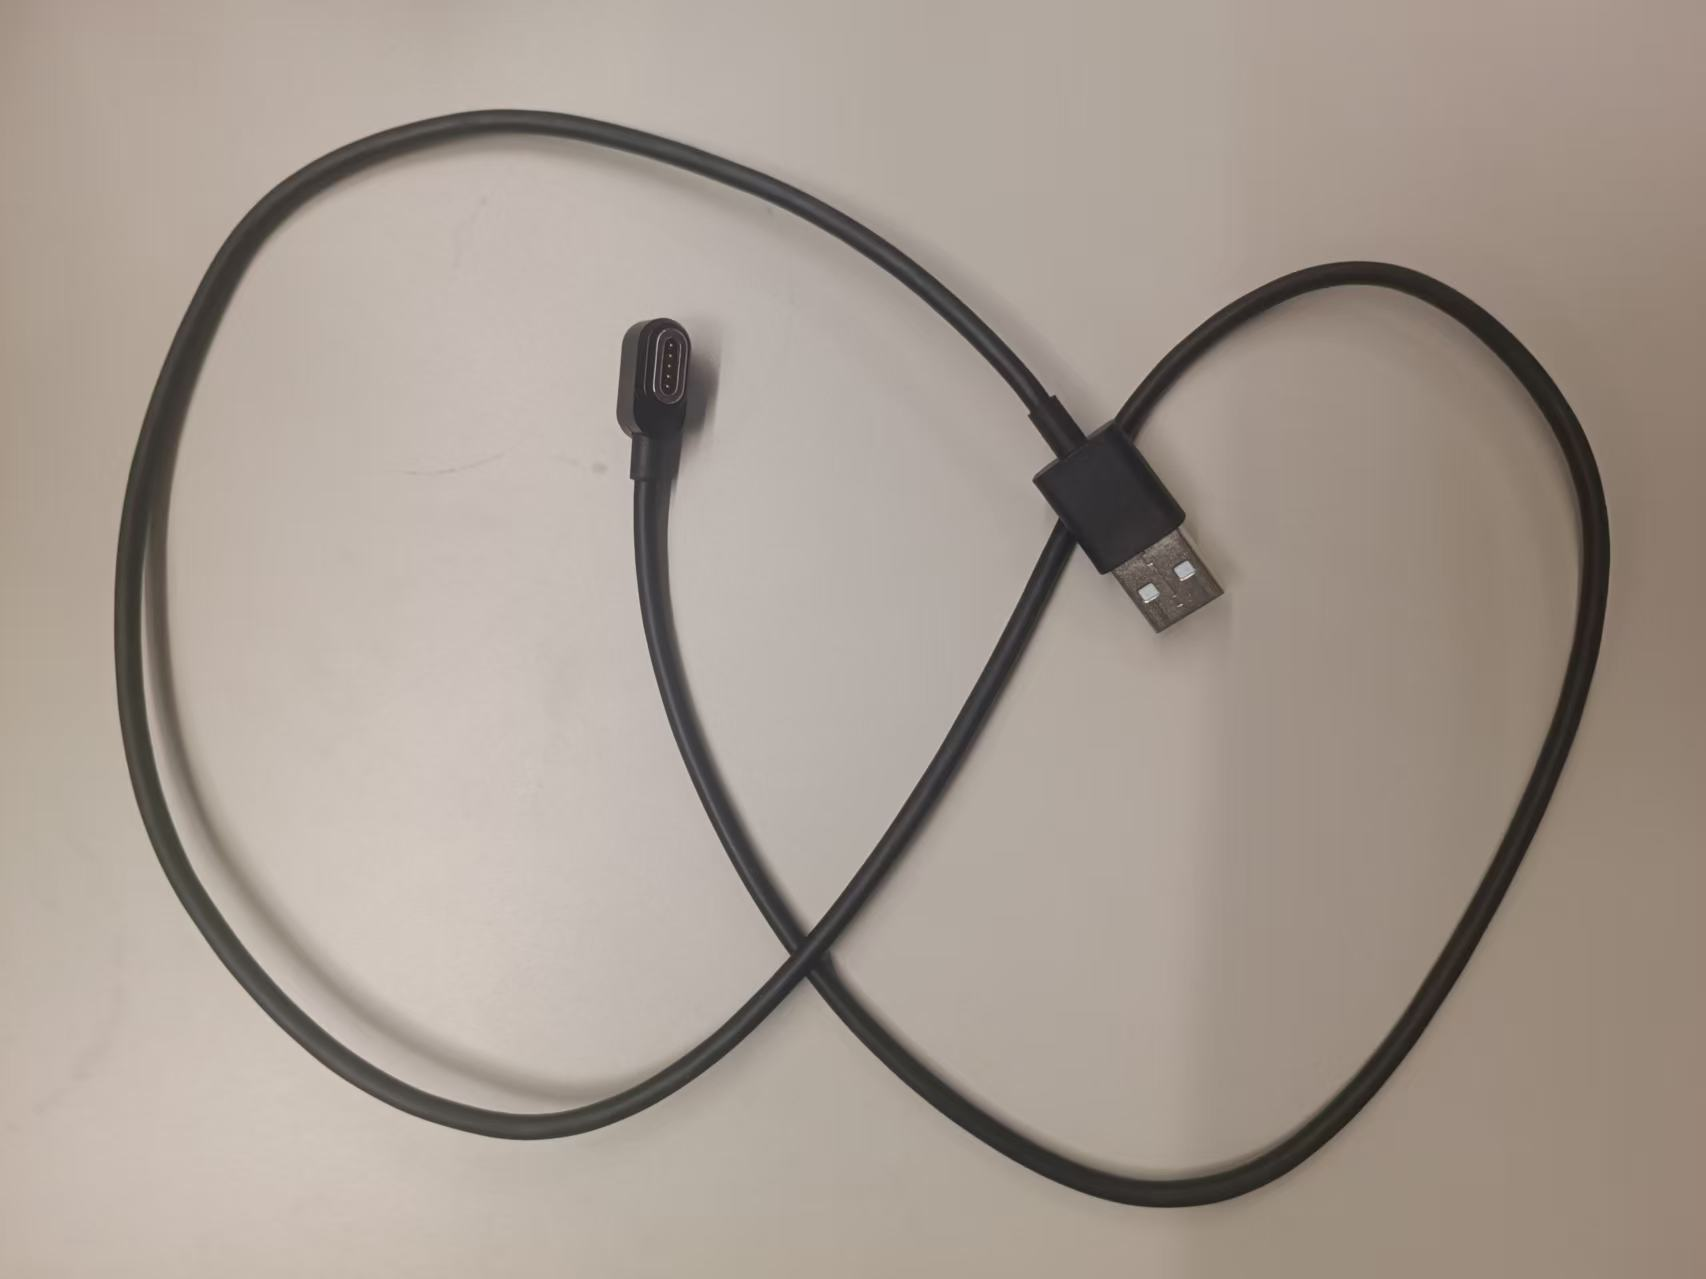
1. Confirm the cable and screen mirroring tool first
Before running the glasses Demo, make sure you are using the Glass3 data debug cable, not the regular charging cable. Many setup failures happen because the wrong cable is used: the charging cable can charge the glasses, but Android Studio cannot recognize the device through it.
| Item | Purpose | Required |
|---|---|---|
| Glass3 data debug cable | Connects the glasses to your computer so Android Studio can recognize the device and install the glasses Demo. | Required |
| Glass3 charging cable | Charges the glasses. It cannot be used for Android Studio debugging. | As needed |
scrcpy screen mirroring | Mirrors the glasses display to your computer so you can confirm installation, runtime state, and UI behavior. | Strongly recommended |
1.1 Glass3 data debug cable
The debug cable lets Android Studio recognize the glasses device. You need it to run the glasses Demo, view logs, and install APKs.
After connecting, Android Studio should show a device such as Rokid RG-glasses. If no device appears, first check whether you are using the data debug cable.
1.2 Glass3 charging cable
The charging cable is only for charging. It cannot be used as the debug cable for the glasses Demo.
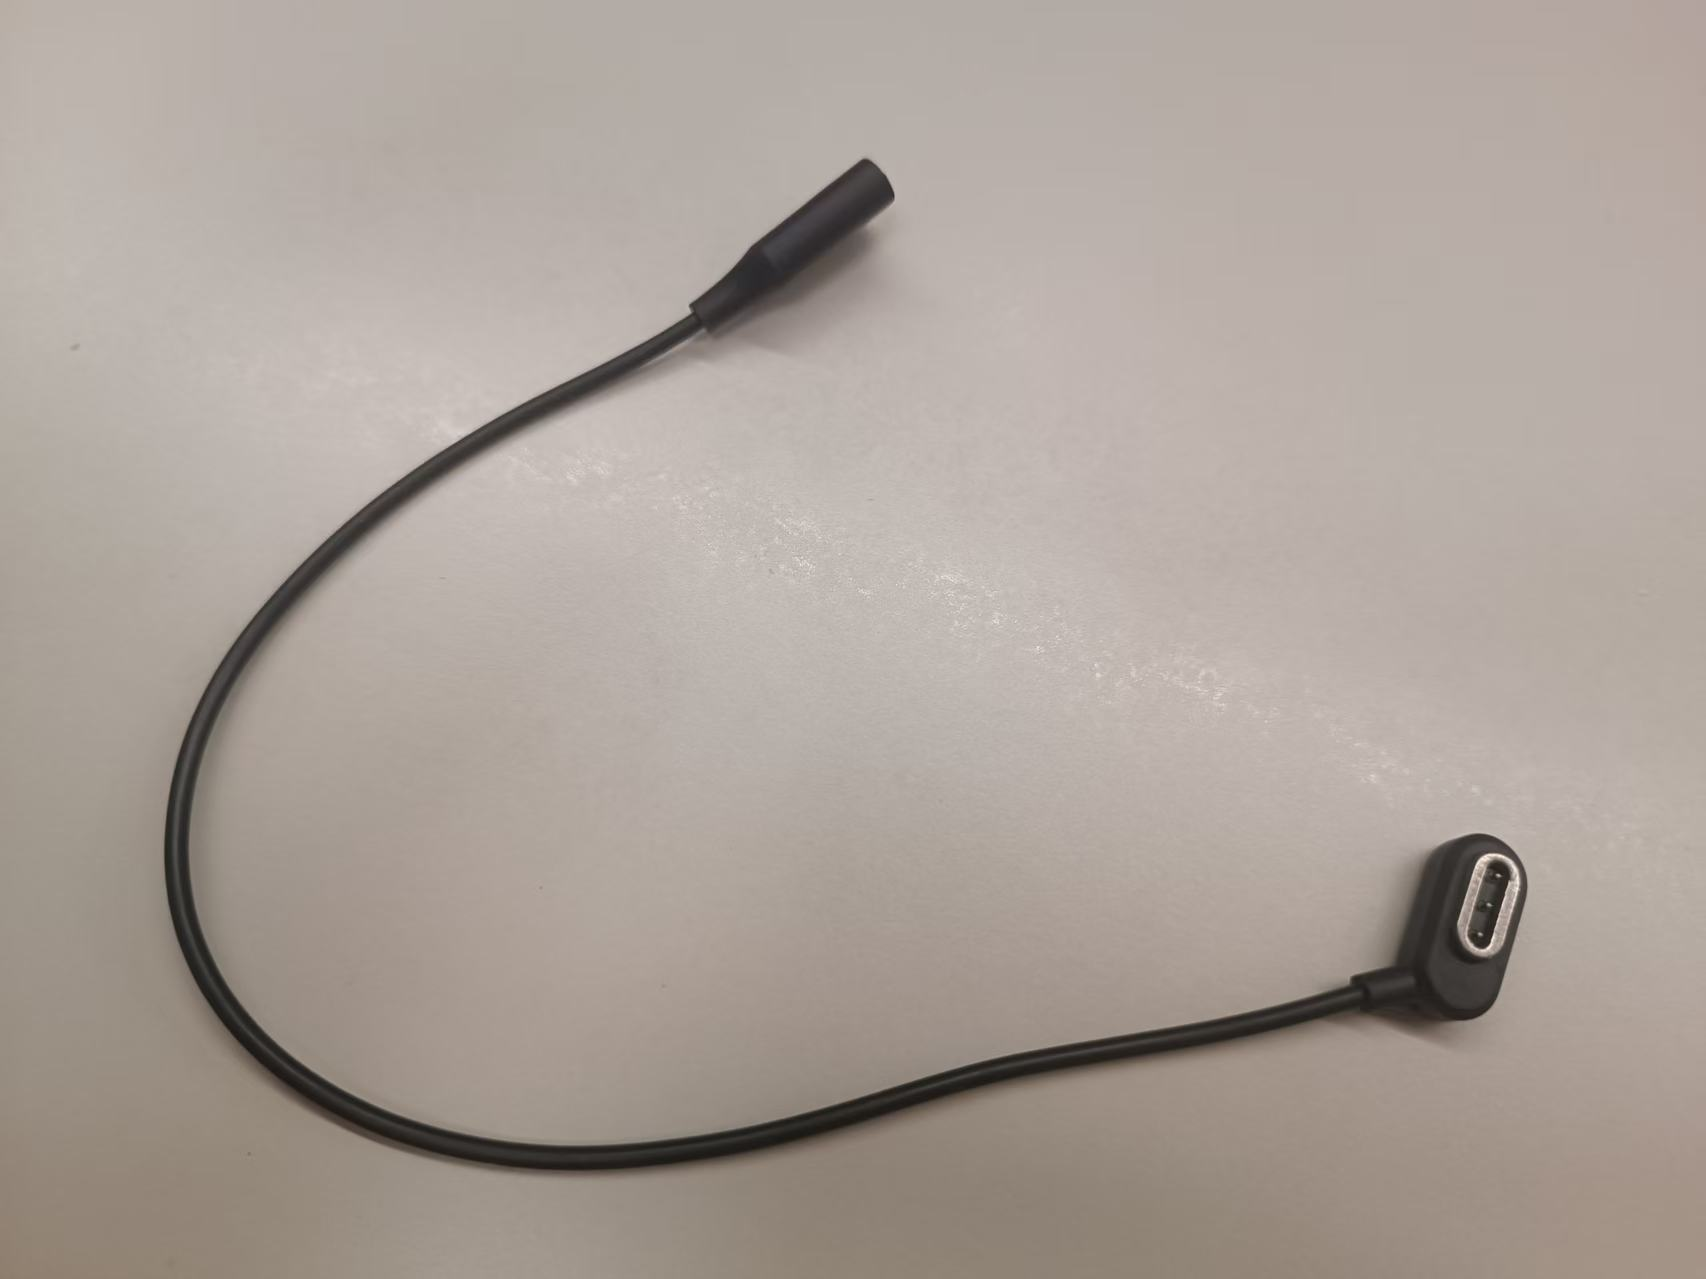
If the glasses charge but Android Studio cannot see the device, the cable is usually not the data debug cable.
1.3 Understand scrcpy
We recommend using scrcpy to mirror the glasses screen to your computer. This helps confirm whether the glasses Demo starts, whether pages render, and whether interactions work.
For download, installation, and usage details, see screen mirroring tool: scrcpy.
2. Prepare the development environment
2.1 Development environment
| Item | Requirement |
|---|---|
| Android Studio | 2022 or later recommended |
| JDK | 17 or later |
| Android | Glass3 SDK supports Android 8.0 or later |
| Devices | Rokid Glass3 glasses and an Android phone |
3. Configure Maven repository
Add Rokid Maven to your project.
For Gradle 7.0 or later, configure settings.gradle:
dependencyResolutionManagement {
    repositories {
        google()
        mavenCentral()
        maven { url 'https://maven.rokid.com/repository/maven-public/' }
    }
}
For Gradle versions earlier than 7.0, configure the root build.gradle:
buildscript {
    repositories {
        google()
        mavenCentral()
        maven { url 'https://maven.rokid.com/repository/maven-public/' }
    }
}
4. Add SDK dependencies
4.1 Glasses SDK
In the glasses app module build.gradle:
dependencies {
    implementation ('com.rokid.security:glass3.open.sdk:2.2.0-E') {
        exclude group: "org.slf4j"
    }
}
If native library conflicts occur, add:
android {
    packagingOptions {
        pickFirst 'lib/arm64-v8a/libr2aud.so'
        pickFirst 'lib/armeabi-v7a/libr2aud.so'
    }
}
4.2 Phone SDK
In the phone app module build.gradle:
dependencies {
    implementation ('com.rokid.security:phone.sdk:2.2.0-E') {
        exclude group: "org.slf4j"
    }
}
5. Permissions
Declare permissions in app/src/main/AndroidManifest.xml according to the capabilities your app uses.
5.1 Phone-side common permissions
<!-- Basic -->
<uses-permission android:name="android.permission.INTERNET" />
<uses-permission android:name="android.permission.ACCESS_NETWORK_STATE" />
<uses-permission android:name="android.permission.ACCESS_WIFI_STATE" />
<uses-permission android:name="android.permission.CHANGE_WIFI_STATE" />
<uses-permission android:name="android.permission.CHANGE_NETWORK_STATE" />

<!-- Media -->
<uses-permission android:name="android.permission.CAMERA" />
<uses-permission android:name="android.permission.RECORD_AUDIO" />
<uses-permission android:name="android.permission.VIBRATE" />

<!-- Storage -->
<uses-permission android:name="android.permission.READ_EXTERNAL_STORAGE" />
<uses-permission android:name="android.permission.WRITE_EXTERNAL_STORAGE" />

<!-- Bluetooth before Android 12 -->
<uses-permission android:name="android.permission.BLUETOOTH" />
<uses-permission android:name="android.permission.BLUETOOTH_ADMIN" />

<!-- Bluetooth Android 12+ -->
<uses-permission
    android:name="android.permission.BLUETOOTH_SCAN"
    android:usesPermissionFlags="neverForLocation" />
<uses-permission android:name="android.permission.BLUETOOTH_CONNECT" />
<uses-permission android:name="android.permission.BLUETOOTH_ADVERTISE" />

<!-- Location and Wi-Fi P2P -->
<uses-permission android:name="android.permission.ACCESS_COARSE_LOCATION" />
<uses-permission android:name="android.permission.ACCESS_FINE_LOCATION" />
<uses-permission
    android:name="android.permission.NEARBY_WIFI_DEVICES"
    android:usesPermissionFlags="neverForLocation" />

<uses-feature
    android:name="android.hardware.wifi.direct"
    android:required="false" />
<uses-feature
    android:name="android.hardware.camera"
    android:required="false" />
On Android 6.0 or later, dangerous permissions usually require runtime requests in addition to manifest declarations.
5.2 Glasses-side common permissions
<!-- Basic -->
<uses-permission android:name="android.permission.INTERNET" />
<uses-permission android:name="android.permission.ACCESS_NETWORK_STATE" />
<uses-permission android:name="android.permission.ACCESS_WIFI_STATE" />
<uses-permission android:name="android.permission.CHANGE_WIFI_STATE" />
<uses-permission android:name="android.permission.CHANGE_NETWORK_STATE" />

<!-- Media -->
<uses-permission android:name="android.permission.CAMERA" />
<uses-permission android:name="android.permission.RECORD_AUDIO" />
<uses-permission android:name="android.permission.VIBRATE" />

<!-- Storage -->
<uses-permission android:name="android.permission.READ_EXTERNAL_STORAGE" />
<uses-permission android:name="android.permission.WRITE_EXTERNAL_STORAGE" />
<uses-permission
    android:name="android.permission.MANAGE_EXTERNAL_STORAGE"
    tools:ignore="AllFilesAccessPolicy,ScopedStorage" />

<!-- Bluetooth -->
<uses-permission android:name="android.permission.BLUETOOTH" />
<uses-permission android:name="android.permission.BLUETOOTH_ADMIN" />
<uses-permission
    android:name="android.permission.BLUETOOTH_SCAN"
    android:usesPermissionFlags="neverForLocation"
    tools:targetApi="31" />
<uses-permission android:name="android.permission.BLUETOOTH_CONNECT" />
<uses-permission android:name="android.permission.BLUETOOTH_ADVERTISE" />

<!-- Location and Wi-Fi P2P -->
<uses-permission android:name="android.permission.ACCESS_COARSE_LOCATION" />
<uses-permission android:name="android.permission.ACCESS_FINE_LOCATION" />
<uses-permission
    android:name="android.permission.NEARBY_WIFI_DEVICES"
    android:usesPermissionFlags="neverForLocation"
    tools:targetApi="31" />

<uses-feature
    android:name="android.hardware.wifi.direct"
    android:required="false" />
<uses-feature
    android:name="android.hardware.camera"
    android:required="false" />
6. Check SDK status with one line
After adding dependencies, permissions, and initialization code, print the SDK status on each side to confirm whether the SDK is available.
Glasses side:
Log.d("SDK_CHECK", "glass sdk ready = ${GlassSdk.isReady()}")Phone side:
Log.d("SDK_CHECK", "phone sdk initialized = ${PSecuritySDK.getMobileEngineService().isInit()}")If the log prints true, the SDK on that side has been initialized or is available. If it prints false, check your initialization code, or refer to the Demo running guide and API Reference.
7. Next steps
- To run the complete Demo: read Demo running guide.
- To integrate by capability: read Code samples.
- To design glasses-side UI: read Glasses UI guidelines.
- To look up APIs: read API Reference.
- If you run into issues: read FAQ overview.